I have one task for today: to upload hyper-v vhdx image to azure and start vm. So let's try to realize this interesting thing.
Do the following steps:
(you can read detailed steps here)
Step 1: Prep the VHD
Step 2: Create or get info from your Azure storage account
Step 3: Connect to your subscription from Azure PowerShell
Open the Azure PowerShell console.
Type:
Add-AzureAccount
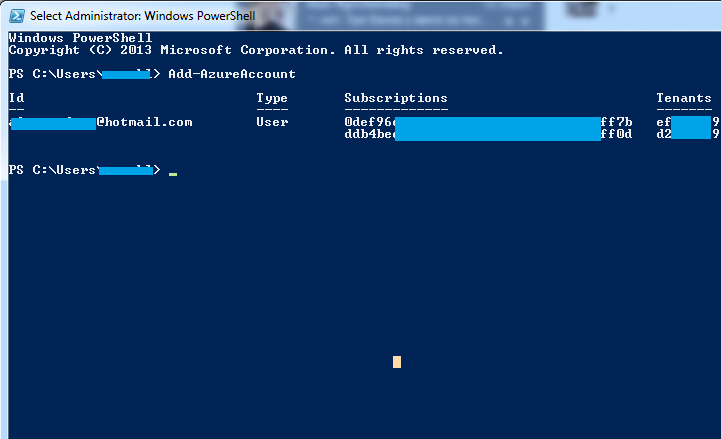
In the sign-in windows, type the user name and password of your work or school account.

Azure authenticates and saves the credential information, and then closes the window.
Step 4: Upload the .vhd file
From the Azure PowerShell window you used in the previous step, type a command similar to this:
Add-AzureVhd -Destination "<BlobStorageURL>/<YourImagesFolder>/<VHDName>.vhd" -LocalFilePath <PathToVHDFile>
Where:
BlobStorageURL is the URL for the storage account
YourImagesFolder is the container within blob storage where you want to store your images
VHDName is the name you want the Azure portal to display to identify the virtual hard disk
PathToVHDFile is the full path and name of the .vhd file
Here I received following error:

So be aware of:
Virtual Machines in Azure must be .vhd files. They cannot be .vhdx or other platforms. There are easy ways to convert to .vhd though.
Convert-VHD –Path “C:\VM\Virtual Hard Disks\MyVM.vhdx” –DestinationPath “C:\VM\Virtual Hard Disks\MyNewVM.vhd”
You should also be aware that there are limits to the size of the VM that you can attach. I went through the process I’m about to describe to you only to find out that at my .vhd was too large. The maximum supported OS disk size is 128 GB. Any larger and you will see an error like the screen shot below. Notice this is just the OS disk size so that tells you that other disks that are larger can be attached later.

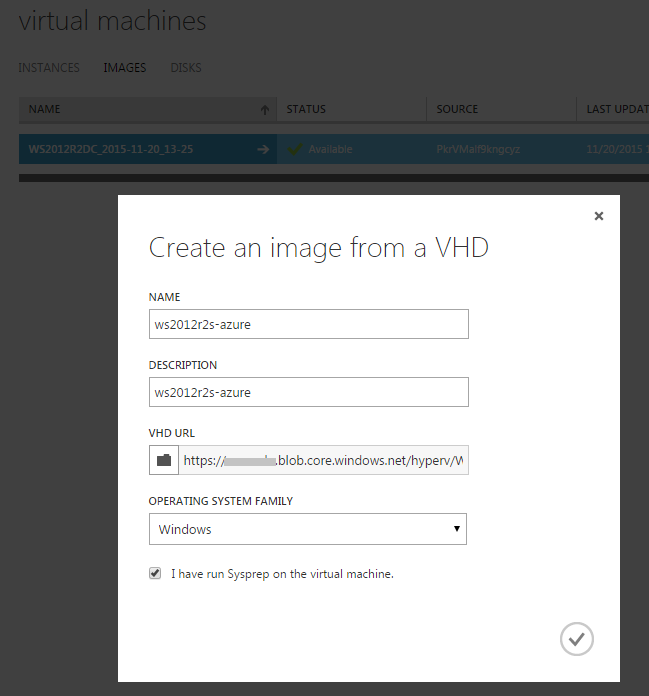
Step 5: Add the image to your list of custom images
-
From the Azure portal, under All Items, click Virtual Machines.
-
Under Virtual Machines, click Images.
-
Click Create an Image.
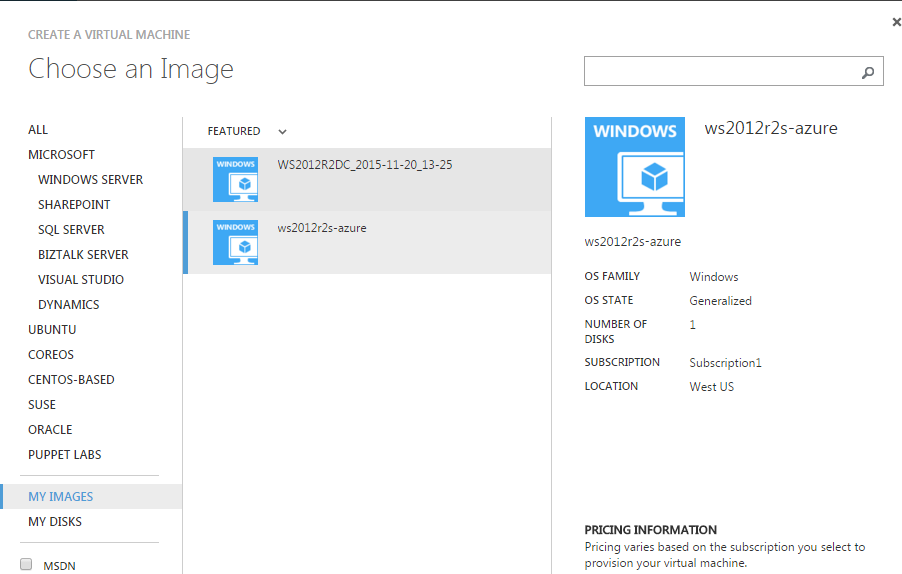
After you complete the previous steps, the new image is listed when you choose the Images tab.
This new image is now available under My Images when you create a virtual machine.

Leave a Reply